Bend line UP vs DOWN: how to read engraved bend marks
GUIDE · 3 MIN READ · PUBLISHED
This is the one place in a build where a mistake costs real metal. Read it before your first bend.
What's engraved on each part
Everything you need is on the steel already — engraved during cutting. No marking out by hand.
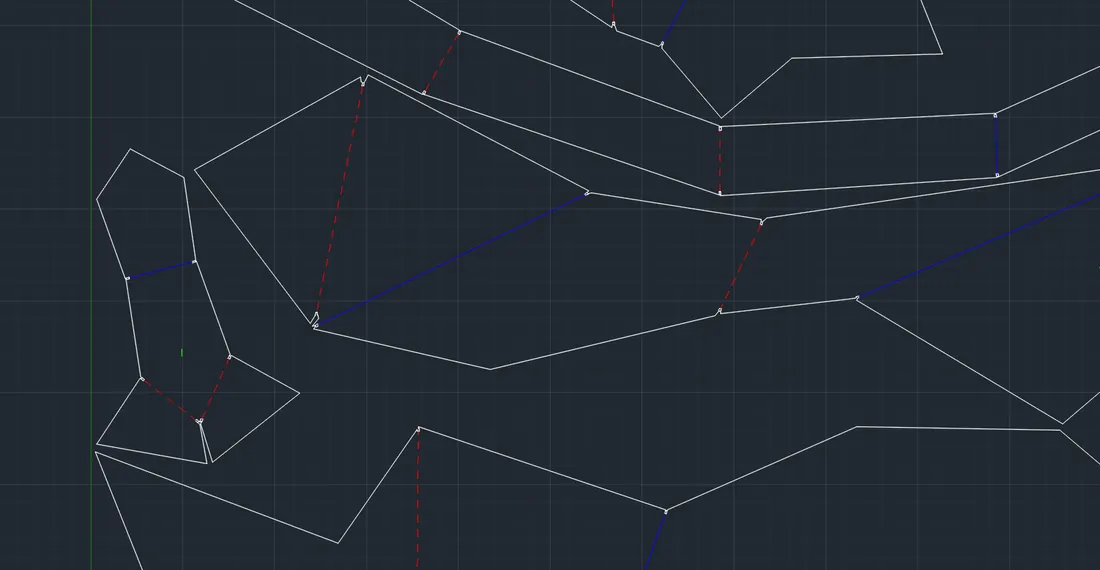
- Bend lines, each labeled with direction and angle: for example 35.9 UP or 4.6 DOWN. The number is the bend angle in degrees.
- Part number. On symmetric models it ends in L or R — left or right.
- Bend relief notches — small half-round cuts at the ends of bend lines. Not a cutting defect: they relieve stress in the corner so the metal bends exactly on the line.
The rule: UP and DOWN follow the engraved side
By default the engraving faces outward on the finished sculpture. Lay the part engraving toward you:
- UP — bend toward you.
- DOWN — bend away from you.
Want the engraving hidden?
You can build with the engraving facing in. Then every direction flips: a line marked UP bends down, and the other way round. Each Denerog assembly instruction has a page showing both options.
Symmetric or asymmetric? Check first
- Symmetric model: flipping is safe. Right parts become left and left become right, but the sculpture comes out the same.
- Asymmetric model: flip the parts and the whole sculpture builds as a mirror image.
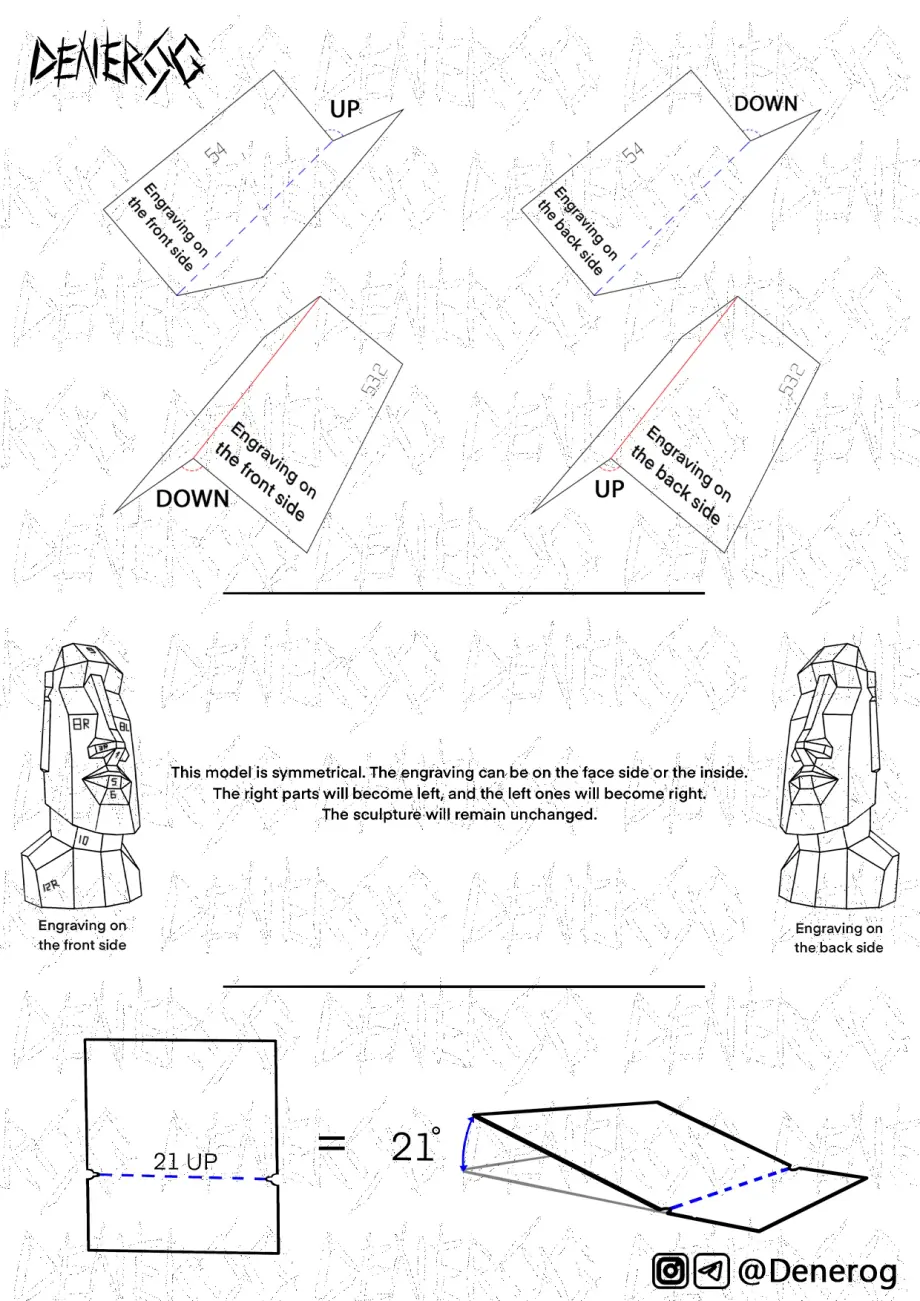
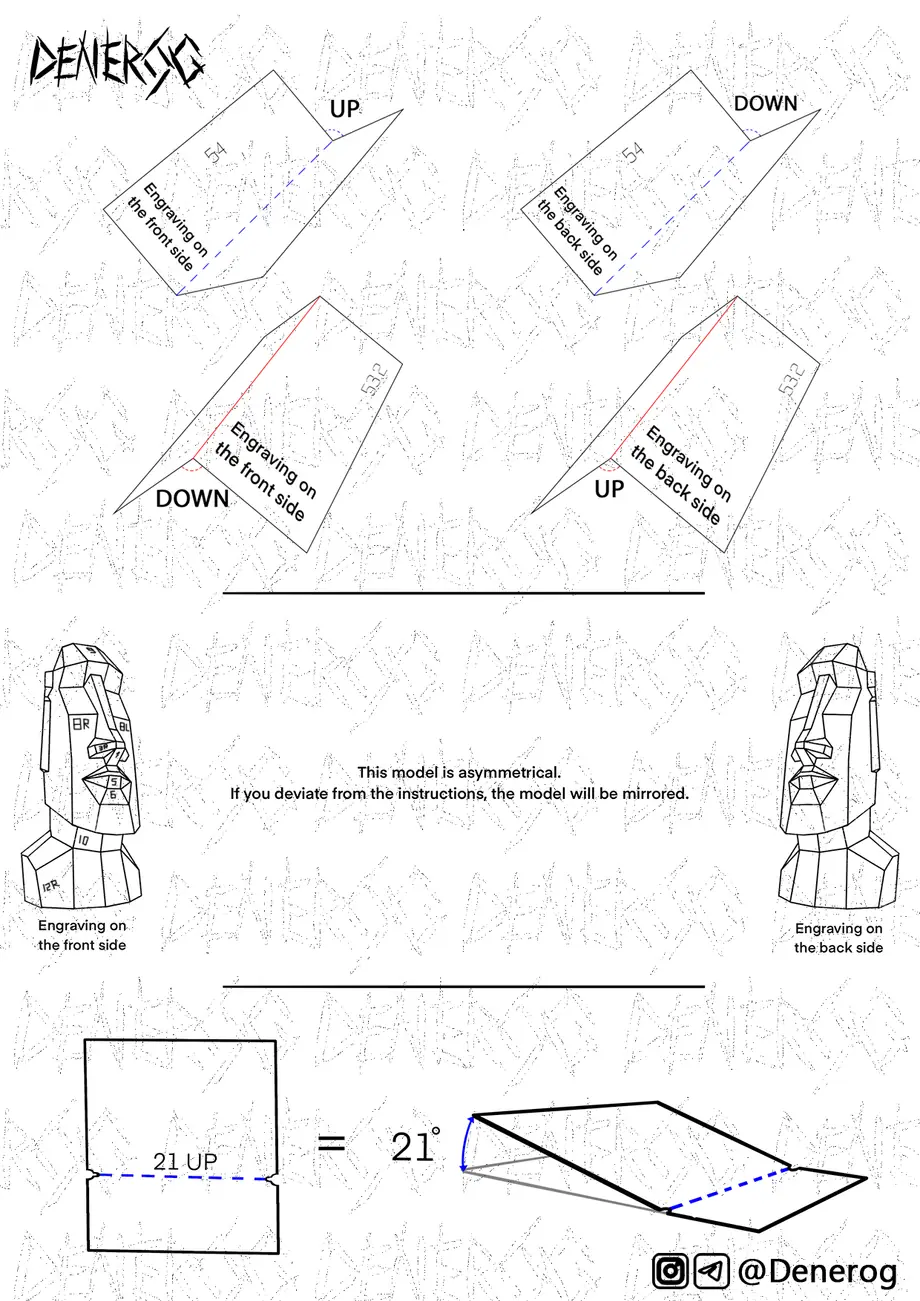
Find out which type yours is before you start.
Check before the first tack
Lay out all bent parts and compare each one with its 3D view in the assembly PDF. Every part has its own page: where it sits on the sculpture, its flat pattern, and the bent part with direction arrows. You're looking for one thing — a bend that went the wrong way. Right now you can open it and bend again. After tack welding, you can't.
No press brake? See how to bend fold lines without a press brake. Next step: tack before you weld.
FAQ
What does the number on a bend line mean?
The bend angle in degrees.
Is UP toward the engraving or away from it?
With the engraved side facing you, UP bends toward you and DOWN bends away.
What is a bend relief in sheet metal?
Relief notches. They relieve stress in the corner so the bend lands exactly on the line.
Why did my sculpture come out mirrored?
The parts were bent with the engraving facing the other way on an asymmetric model. All UP/DOWN directions flip when you flip the part.
More builder guides
- How to get a DXF laser cut (quote email included)
- Bend fold lines without a press brake
- Tack before you weld: panel order
- Grinding welds without rounding the edges
- Corten vs mild steel vs stainless
Denerog plans mark each fold with its direction and exact angle, right on the metal.
Browse plans